If you’re a fan of Apple’s operating system and can’t afford Mac devices and would like to have it running on your Windows PC, join us in this tutorial.
At the recent WWDC17 event, Apple made some important announcements. The launch of the macOS High Sierra 10.13 Final was one of the major events. This version of Mac provides users with reliable and responsive features over any version of Mac. It stores data better has better graphics and many other enhancements that every Mac user will love. The good news is that this time, in addition to Mac users, others can enjoy the features of this new operating system. So How? Only by installing macOS High Sierra on VMware on Windows PC.
VMware Workstation Player is virtualization software that allows Windows users to run another operating system on their PC in parallel with each Windows version they use. VMware is the best option for those who are looking for free virtualization software. There are some basic, advanced and valuable features in Workstation Pro. One of the best free software to install is the virtual operating system.
You can enjoy all the features of the macOS High Sierra using VMware and a 64-bit computer with at least 4 GB of RAM. How can you do this? You need to have the macOS High Sierra Final image file and the VMware software; then you can install macOS High Sierra in VMware.
Related: Fix The Problem Of macOS Mojave
How to Install macOS High Sierra with VMware on Windows
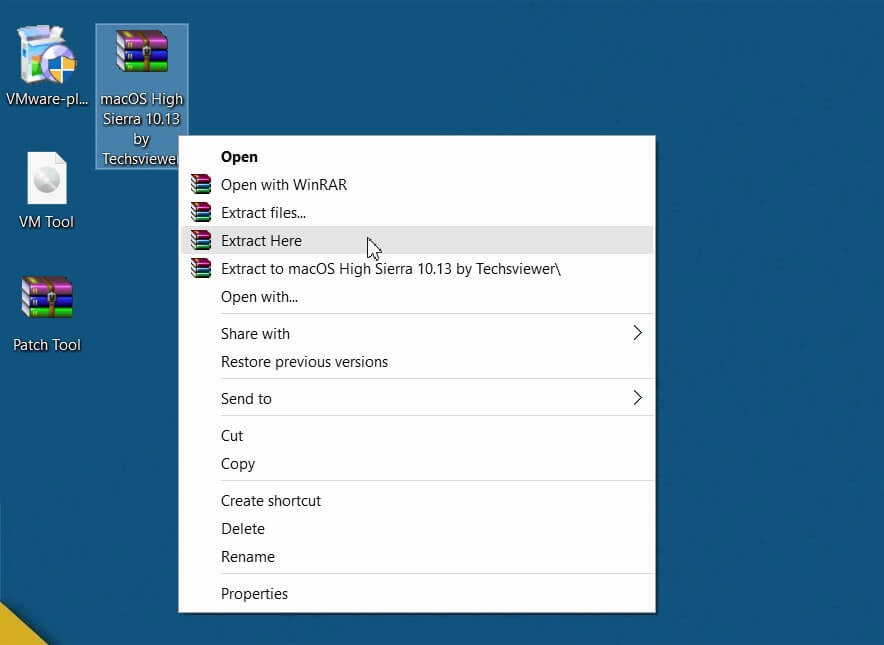
Step 1: Extract High Sierra Virtual Image File
Download and install Winrar or 7Zip, then right-click on “macOS High Sierra.rar” and select Extract Here
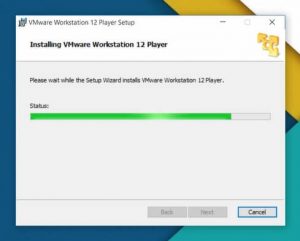
Step 2: Install VMware Player.
VMware Player is available for non-commercial use and can be used for free.
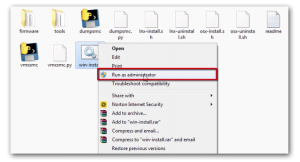
Step 3: Patch VMware.
Open the Patch Tool folder and then right-click the win-install.cmd file, select “Run as Administrator”.
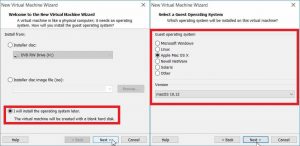
Step 4: Create a new virtual machine.
Open the VMware Player and select “Create New Virtual Machine”.
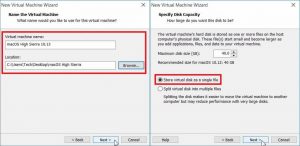
Select “Install the Operating system later” and in the Guest OS section macOS and in Version 10.12 or 10.13.
Change the name and location of your virtual machine (this is a VMX folder); then click Finish.
Step 5: Edit your virtual machine.
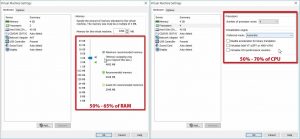
Select your High Sierra and click on “Edit your Virtual Machine”. Set the RAM and CPU to between 50 and 65 percent.
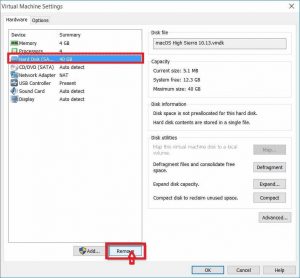
Select the option “Hard Disk (SATA) 40 GB” and then click “Remove”.
Add a new virtual disk to VMware.
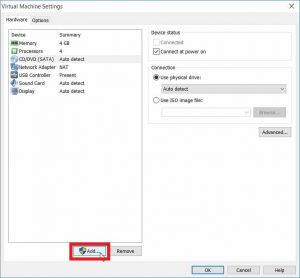
Click on “Hard Disk”, then select “SATA”; and select “Use an existing disk”.
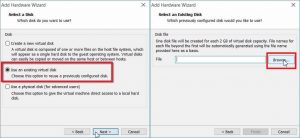
Open the file “macOS High Sierra.vmdk”.

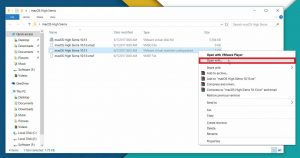
Step 6: Edit the VMX file
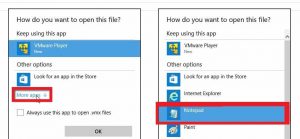
The VMX file is a VMware virtual machine configuration. Open the “macOS High Sierra” folder on the desktop or “\ Documents \ Virtual Machines \”. Right-click on your VMX file and then select “Open with”.
Click “More Apps” and select “Notepad” to open this file.
Add this code: smc.version = “0”

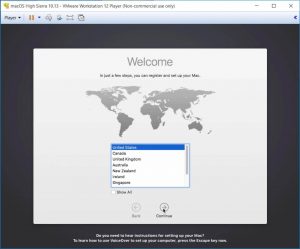
Step 7: Run macOS High Sierra and install VMware Tool.
Open VMware Player; click on “Play virtual machine” and create a new account or account.
Install VM Tool: Click on Player – Removable Devices – CD / DVD – Setting …, open the “VM Tool.iso” file; and check the “Connected” button in the Device status section. Then click “OK”.

You need to enable VMware extension in System Preference.
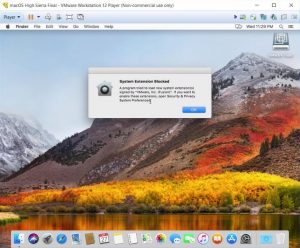
Go to “System Settings” and “Security & Privacy”.
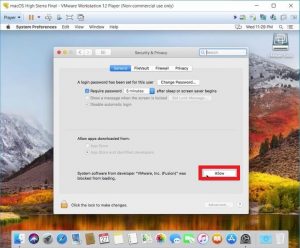
Click the “Allow” button, wait for the installation to be successful, then restart your virtual machine or click restart.
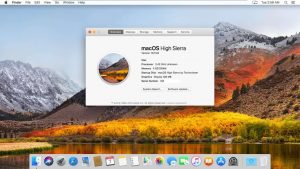
Done! You have the final version of the macOS High Sierra on VMware and on Windows.
Before You Go:
This article was about how to install macOS High Sierra 10.13.6 on Windows with VMware. Also, this article and others like it were created to help you, it would be nice if we had your feedback to see how well or how bad we did with this tutorial. So go ahead and share in the comments.
Suggestion For You:
How to fix the problem on macOS Mojave